
Lesson 10: How to Use the Workers Pages

Bulletproof Notion Work Management System
For Accountants and Bookkeepers
You may not have noticed this tab in your Global Firm Views and if you don’t have and don’t plan to bring in any help, then you can skip this one entirely.
If you do plan to either hire or outsource work to freelancers, then you will want to use this area to set up a page for each person who will work with you to support your clients.
This process is simple at first.
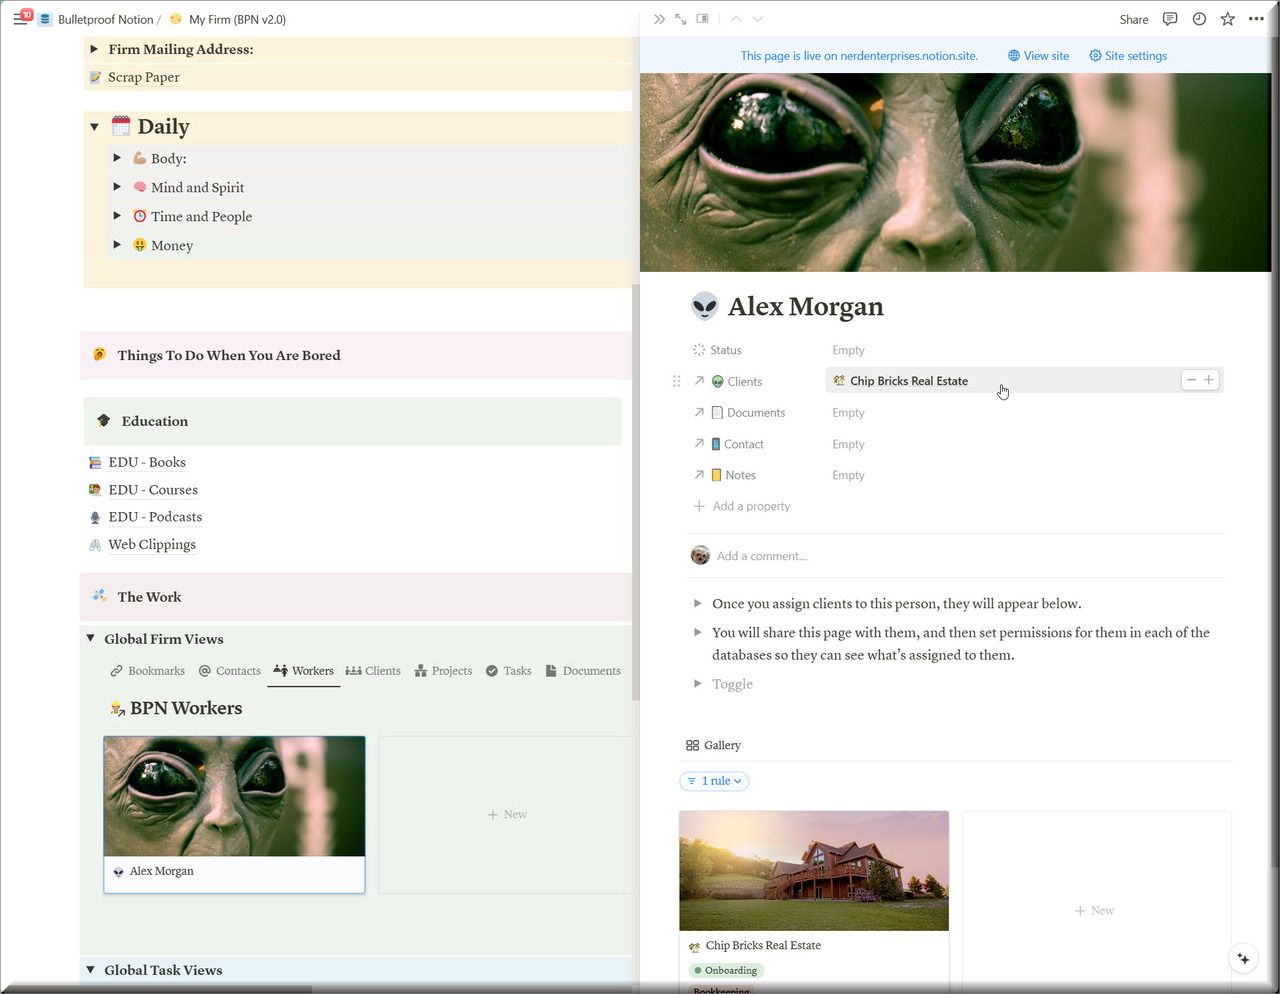
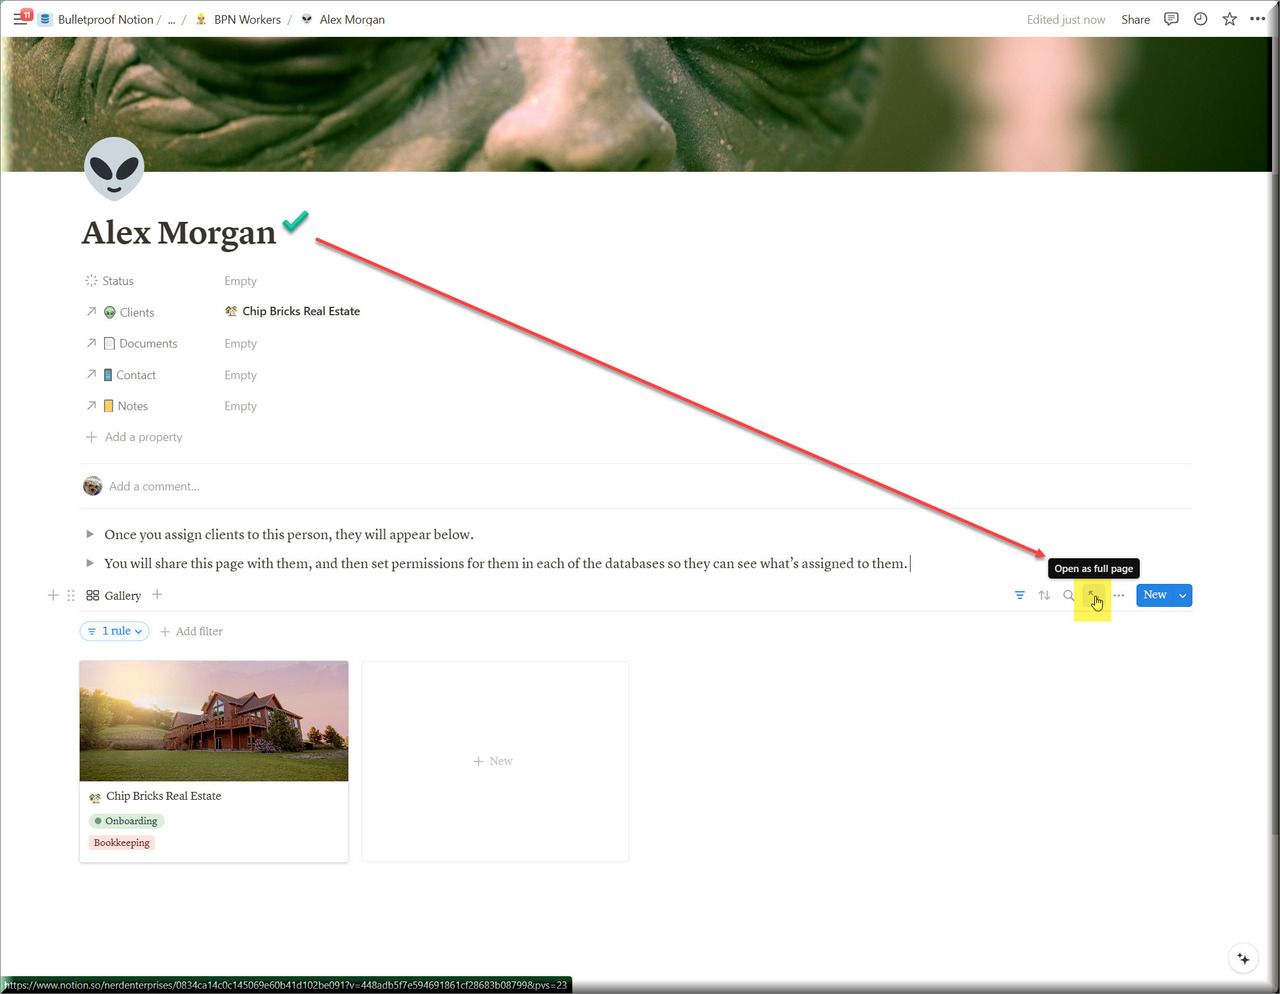
Add a new page and rename it to the name of the person or company you are setting up:
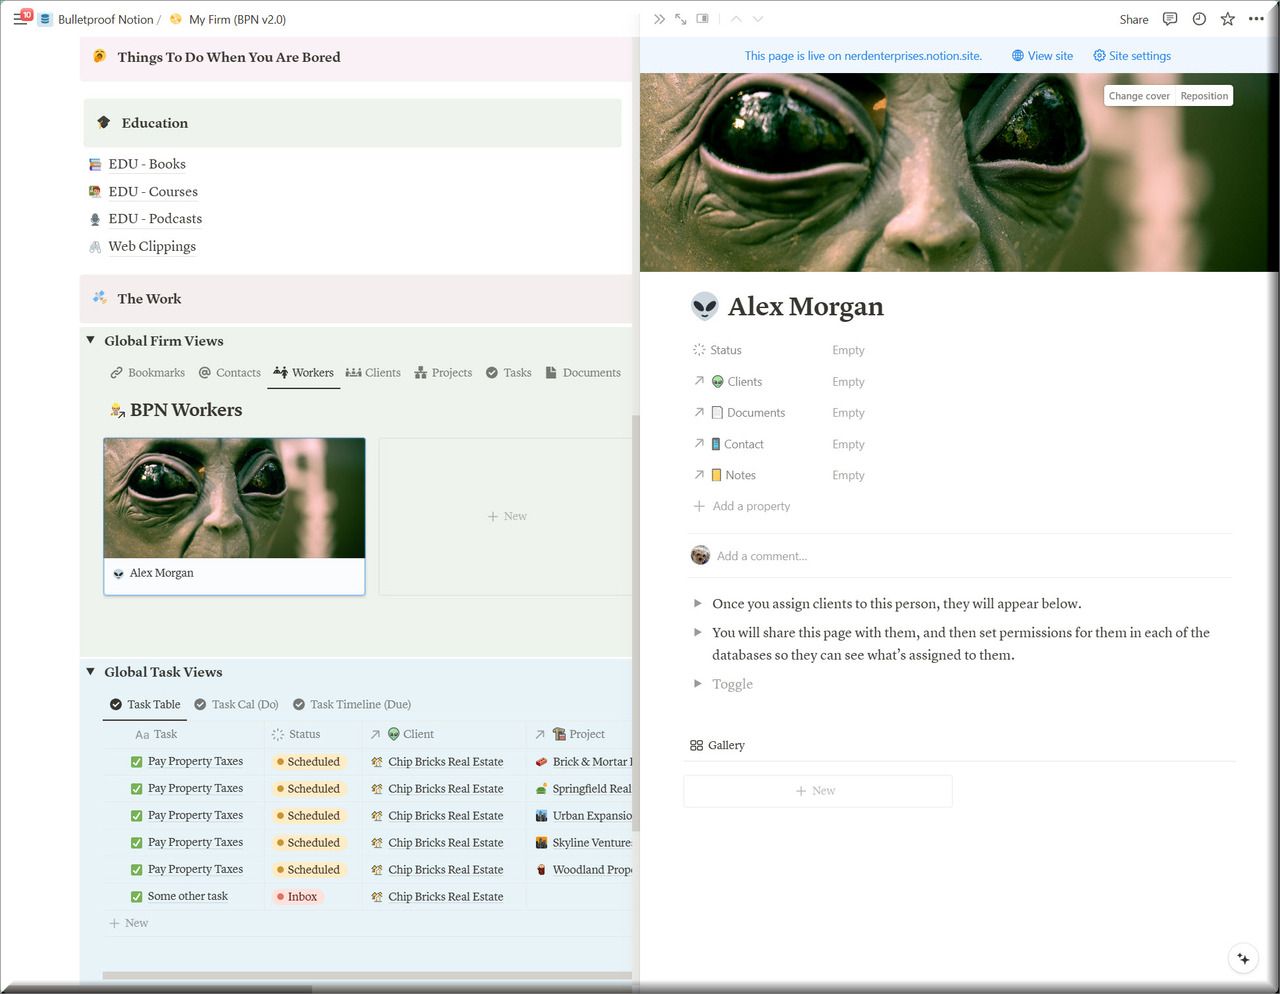
Next assign any clients to them in the Clients field at the top and they will appear instantly below:
Now you can share this page and invite the collaborator as a member (Guest will not do, you will need to pay for users you want to collaborate with at this level).
Let them know that they will get an invite, but they may not be able to see their clients right away. You will confirm when it should be working.
We need them in there as a member so we can set their permissions.
First we’ll need to put some security measures in place.
Initially you can see the client on their page, but they will not be able to. One of the downsides of the way databases work in Notion is that you have to give them permission at the source, and then in any linked view that you have for them.
Before we even do that, we’ll need to apply a “trick” I learned at the source to prevent them from seeing everything there. Otherwise in their Notion account they will see your database sources in their Shared with Me, as well as the Workers Page that you share with them.
So the first thing we need to do is head into the Databases Page (forbidden zone) and lockup each database that we need to share with them:
In fact, you might as well do this for all of them, just in case you decide to share something with them later, that you didn’t originally plan to.
If I look at the Bookmarks and Websites Database (the first one) I can see everything there. This is what we have to fix.
We’ll fix this with an advanced filter. They cannot see any advanced filters you apply, which means they can’t undo them, or change anything about them.
So I filter the database by name with “XXX” since that is not likely going to be the title of anything in any database!

Filter the name for “XXX” and make sure you add it to an advanced filter.
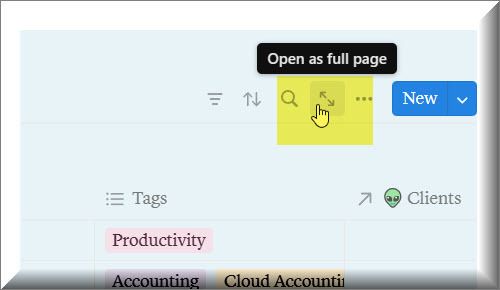
Open the database as a full page:
This is not absolutely necessary, but it’s a good “best practice.”
Then apply the filter:

Reminder you may not see the option to “Save for everyone” but once you have your first collaborator in your Notion account you will start to see that every time you change a setting in a database view.
If you do get it, click it, and then your database should look empty.
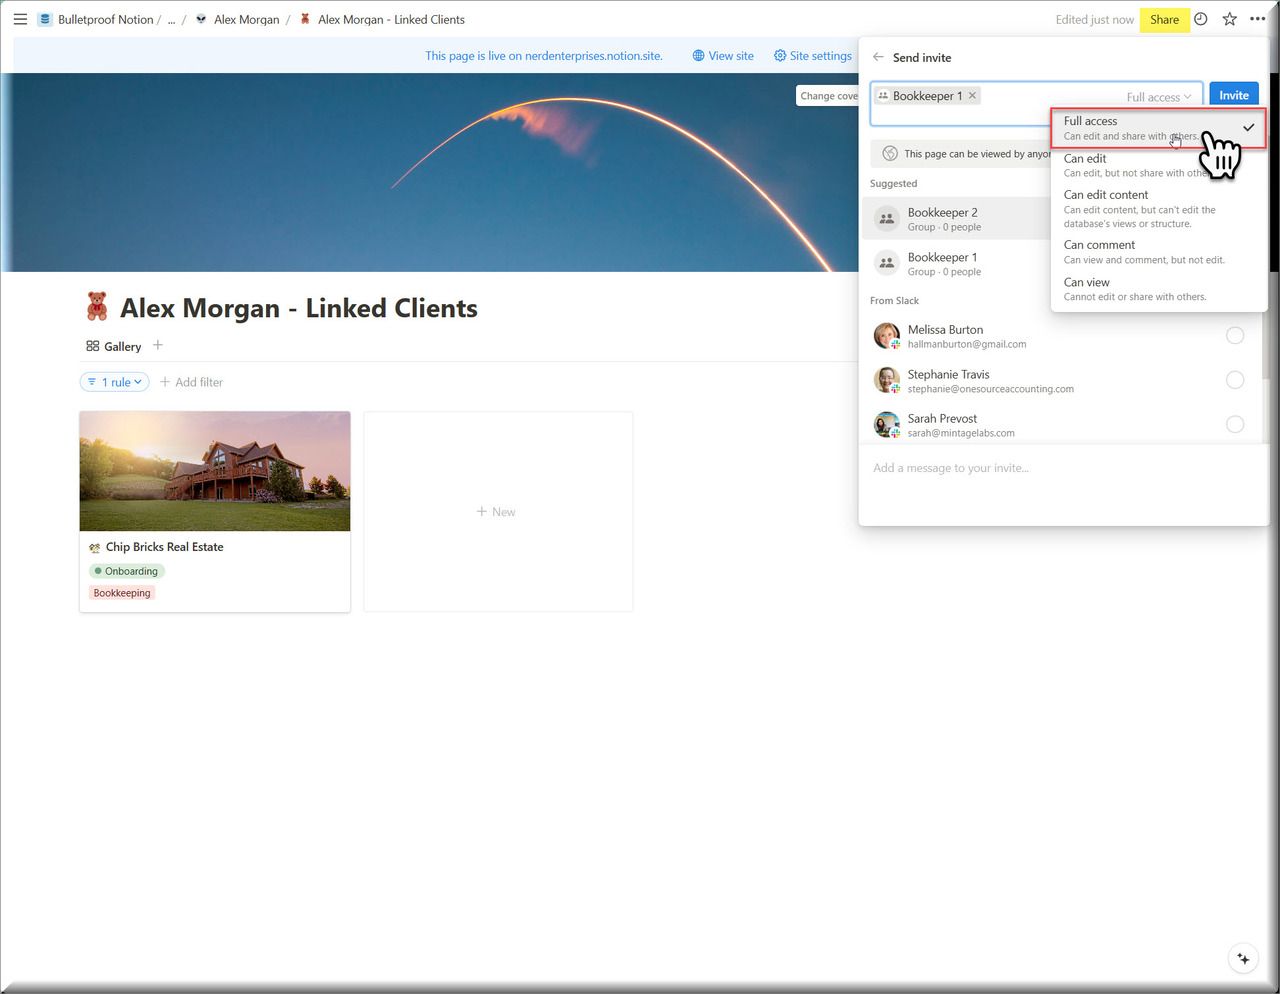
Next, if your worker has accepted your invitation, you can share the database with them. THIS you must do with the database open as a Full Page.
VERY Important!
You must give them the correct level of access here - “Can Edit Content.”

Anything above this level gives them too much access. Anything below is not enough.
In fact this level of access is what specifically precludes them from being able to see or edit your advanced filters.
Make sure you click Invite when you’re done, otherwise it won’t stick! I’ve made this mistake.
Do this for each database that you’ll want to share with them, especially Clients. Also tasks, documents, bookmarks, anything they will need to access for the clients you assign them.
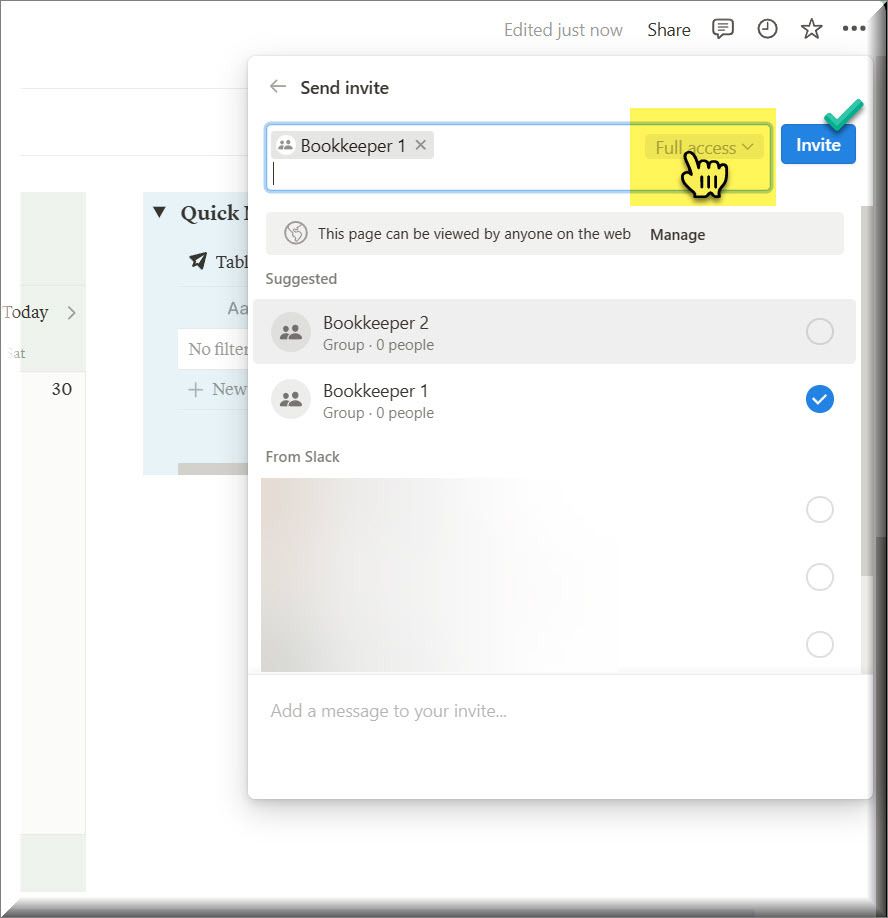
Now you have to expand the linked view on their Worker page and give them Full access there.
Important!
If even one of the linked database views in the client main menu is not shared properly, they will all not show. I figured this out the hard way. When you create a series of linked views in the same table, like the Client Main Menu, it’s all or none.
So make sure you share every single database shown there with them.
Then on this one you want to share FULL ACCESS.
Then you’ll want to click into each client on their page and grant them full access there as well.
Now they should have access to everything you want them to, and nothing you don’t. It is probably a good idea to onboard them by getting on a Zoom, having them share their screen and make sure they can access what they need, create new tasks, and notes, and you should generally show them how the whole thing works.
You especially need to make sure they understand that when they are working on a client, they need to confirm that everything is assigned to that client.

ProTip:
Set up a dummy Notion account in a different browser session. Use a different email address, or append yours as in [email protected].
Set that user up on a Workers Page, and set all of the permissions. Then log in as them in the other browser session and confirm that they can see everything you want them to, and as importantly, that they cannot see anything you don’t want them to.
If you do this, you will see where you have forgotten a step, and you will nail down the process.
Then write up an SOP for adding new team members!
UP NEXT: LESSON 11
The Databases Page - Do's and Don'ts
See ya in the next lesson ;-)

© Copyright 2024 Nerd Enterprises, Inc. All rights reserved. Reproduction or duplication of this content without our express written consent is strictly prohibited.
