
Lesson 12: Databases - How to Create and Link New Databases

Bulletproof Notion Work Management System
For Accountants and Bookkeepers
Up until now, I felt that you can use your Contacts database for vendors and you can assign the status “Vendor - Business” to distinguish them. Then with what you’ve learned so far you could create a linked database filtered for this and include it in a note, or a project.
But the Contacts database is built around an individual. So what if you want to be able to describe the Vendor Company, and then if needed you can link multiple contacts that you may have from that one vendor.
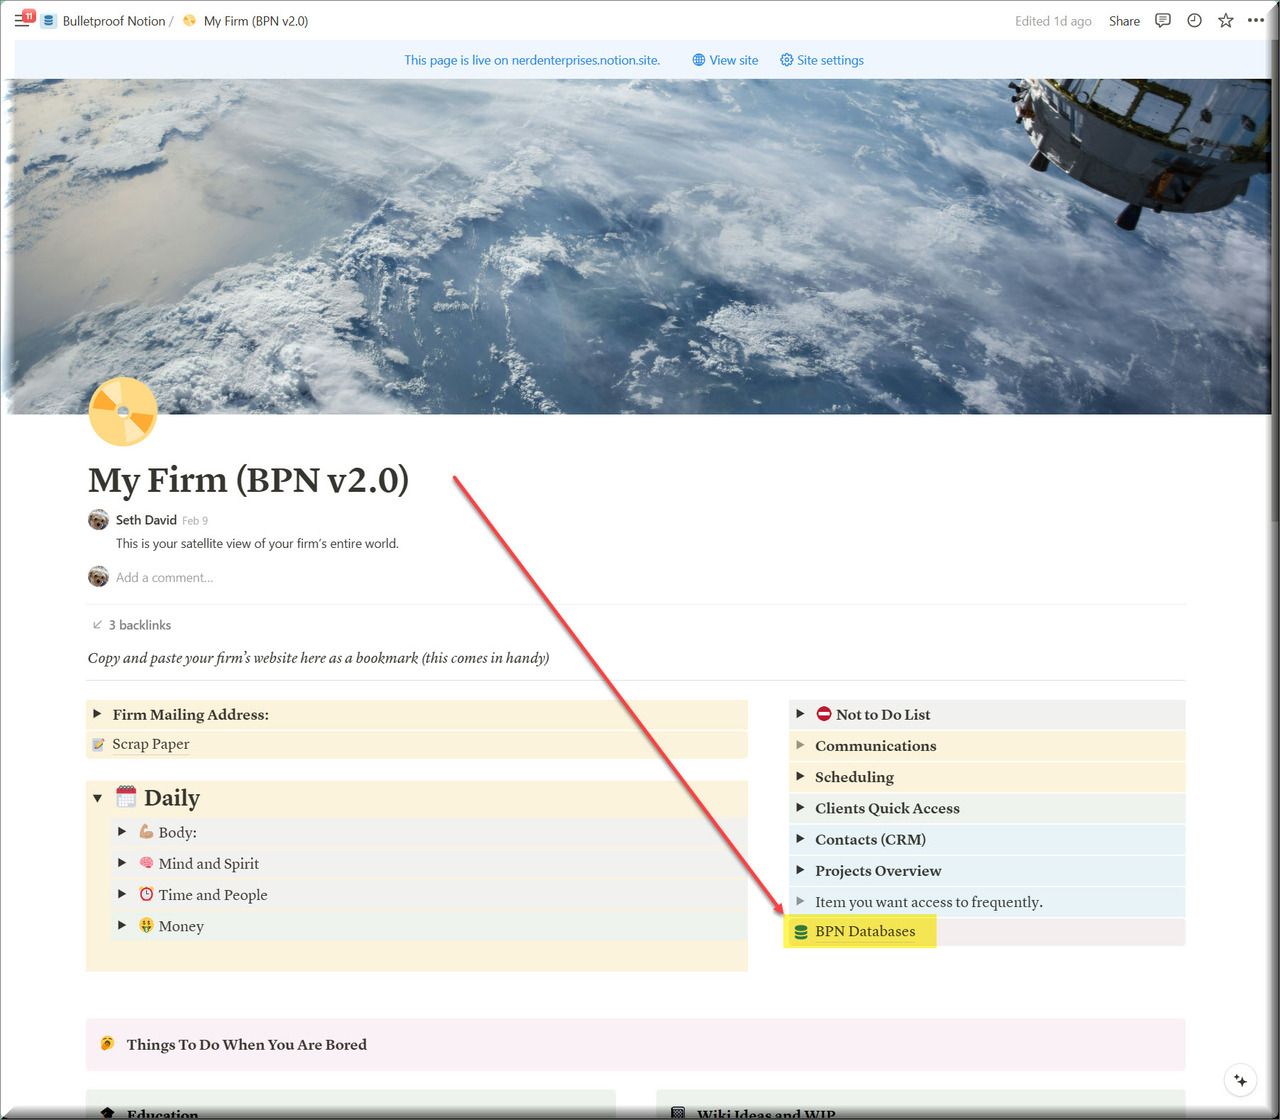
I’m going to use this example to show you how to add this database to your Bulletproof Notion Operating System.
You may now enter the forbidden Zone!
Then add a toggle “/Toggle” and call it Vendor Companies or something like that. Make sure it’s clear that this is for companies and not contacts.
Then add a new database “/Table” (choose New table, start a blank database) inside the toggle, and assign a color to the toggle.
Now let’s add the basics and the obvious Properties based on what we would want to capture about the business. Sometimes it helps to think of an actual vendor in a case like this. Look at the information you have already captured about them somewhere else:
- Company Name (Text)
- Company Address (Text)
- Company City
- Company State
- Company Zip
- Website (URL)
- Phone (Phone)
- Type of Business (Select)
- Contacts (this will be a “Relation” field linked to your Contacts Database).
- Notes (Relation Linked)
- Clients (Relation Linked)
Click the Plus Sign to add each property.
Most of these are straightforward to set up. I will show you how to add a “Relation”

Once you create the first Company Name field, you can save yourself some time by duplicating that and then renaming it. Keep doing this and where needed, edit the field as to type.
The first Relation Field you are going to add is “Contacts.” This is how you can associate any contacts from the Contacts Database with a Vendor in this one.
Don’t duplicate an existing property for this one. Use the Plus Sign.
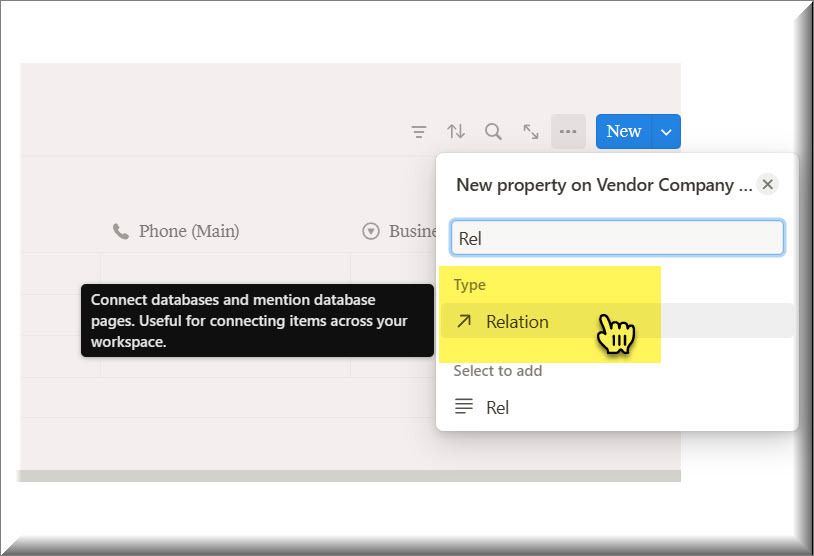
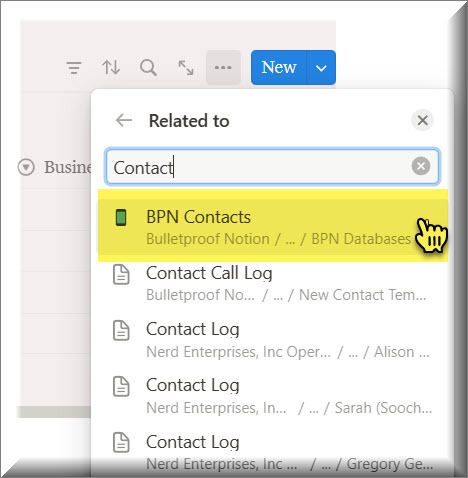
Then make sure you link to the right database.
Then configure the relation as follows (and see below for the explanation):
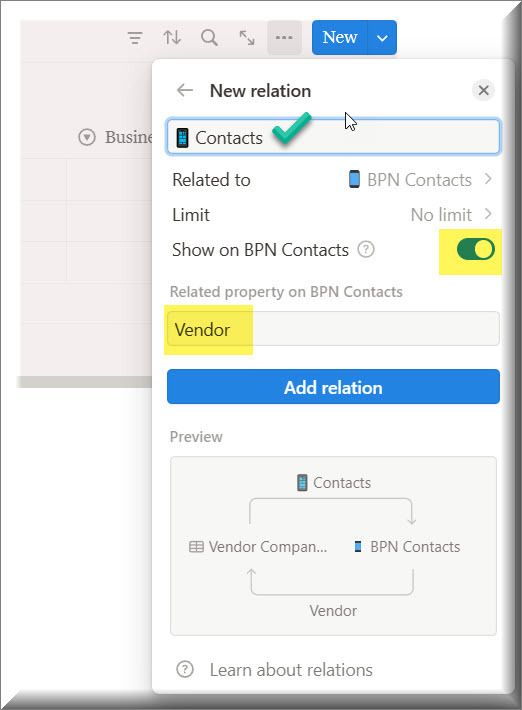
The names should be cleaned up. This is what the column or property will be titled on each side. So when you are looking at a contact, you will want it to say “Vendor” or “Business” or something like that.
Toggle the Show On BPN contacts. This is what enables the linked property to show up on that database.
When you are ready click Add Relation. Don’t worry if you miss something. You can edit this property and change any of this any time.
Do the same thing for each of the other “Relation” properties.
Once this is set up, you can drag the toggle for this database into the section above with the rest of them. And now you can see why the Toggles are so helpful - it’s like having a suitcase to carry these databases around.
In the video I will walk you through the rest of this setup.
UP NEXT: LESSON 13
How to Create an Online Web Form for Notion
See ya in the next lesson ;-)
© Copyright 2024 Nerd Enterprises, Inc. All rights reserved. Reproduction or duplication of this content without our express written consent is strictly prohibited.
