
Lesson 3 - How to Transfer Your Data from V1.0

Bulletproof Notion Work Management System
For Accountants and Bookkeepers
If you started off with Version 2.0 then you can skip this lesson.
If you started off with Version 1.0 or for that matter, prior to coming here you had built your own system for tracking tasks, notes, etc… then this lesson will prove helpful.
Later in the course I am going to dive deeper into databases and how they work.
For now I will explain just enough so you understand what needs to be done here and why.
Let’s say you have a bunch of tasks in Version 1.0. If you open one of those tasks you will see the top section with all of the “Properties” from that database.
In order to get these tasks into the new system without creating a mess, we have to strip them of these properties because the new database has its own version of these properties.
Moreover if you move a task directly from one database to another, and it has any properties filled in, Notion will add those properties to the new database which will create a new mess to clean up.
So we need to do this in two steps.
And this is the ONE time for now that I am going to permit you to mess around in the databases page.
Step 1 - Move your tasks from the old location to the Databases page.
Make sure you have the databases page open in a separate tab and if necessary change the page’s icon so you can be 100% certain about where you are sending your old system tasks.
Another important thing to consider as you export these tasks.
In the old system what were defined as tasks are now potentially going to be split into separate databases. Some might still be tasks, others might be notes, or projects.

Grab tasks from (e.g) one client at a time, so that when you drag them into the new database, you will know exactly which client to assign to all of them.
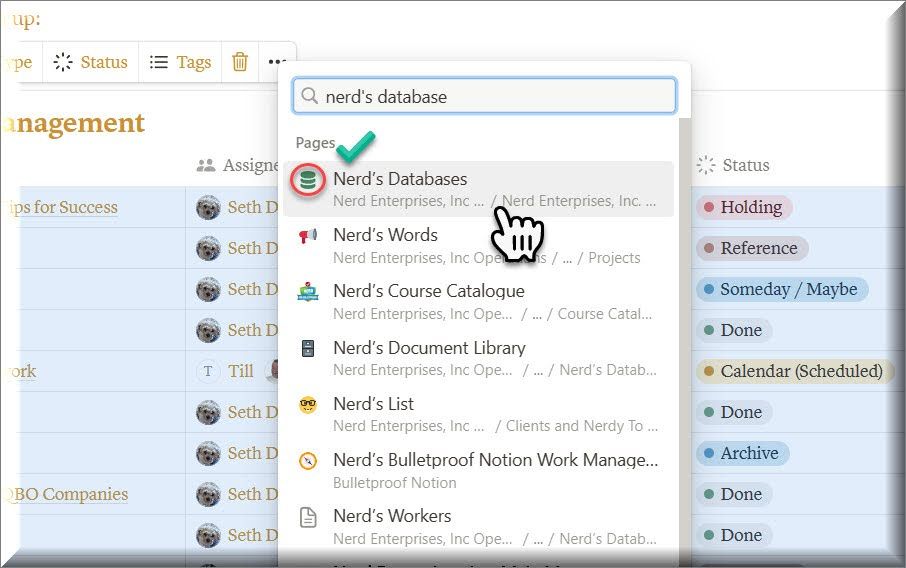
Once you have all of the tasks selected from V1.0 that you are ready to move (select all), choose Move To and then select your Databases Page:
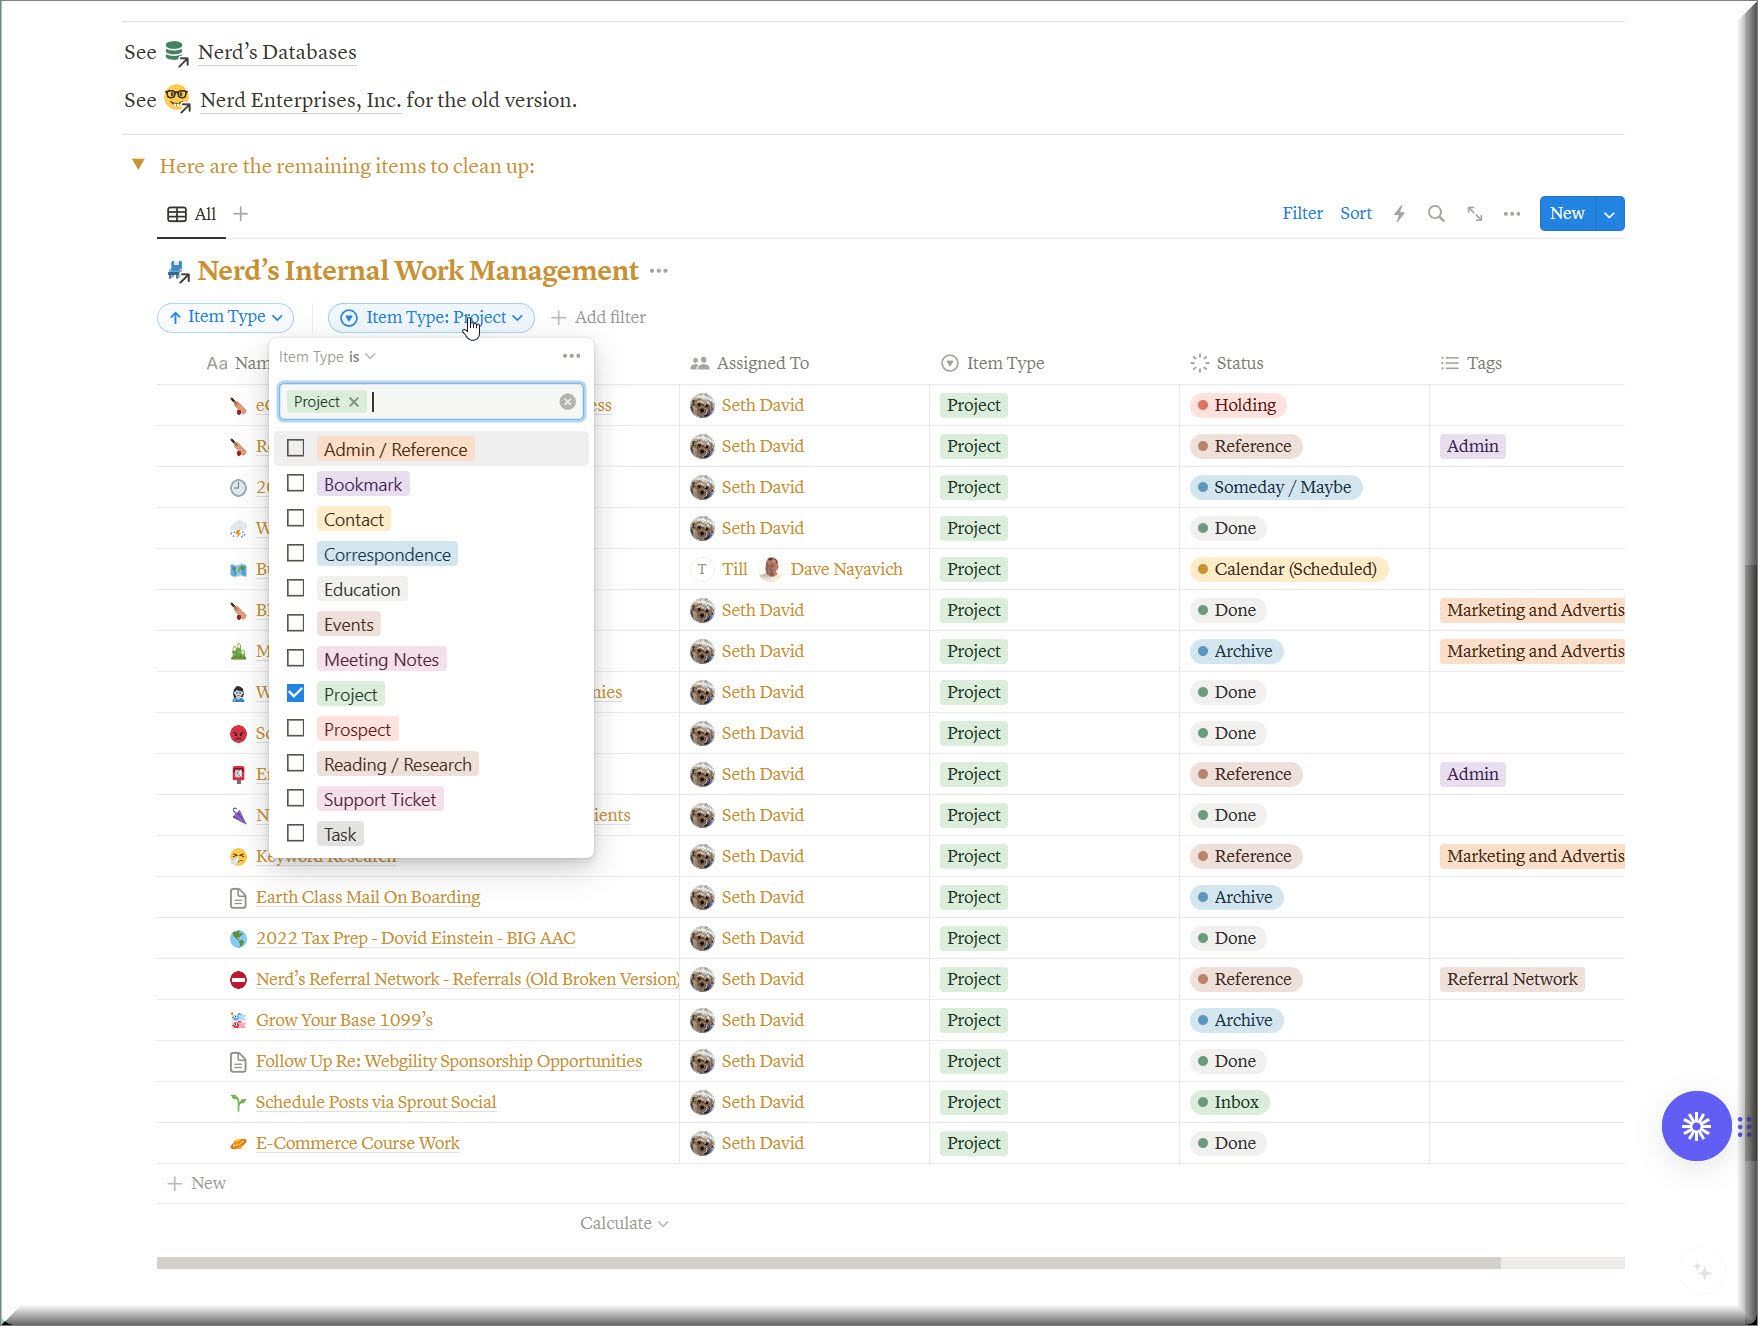
In the figure, I am filtering my list for what I had defined as “Projects”.
The difference is that in V1.0 “Project” was defined in the properties of my Work Management Database.
In Version 2.0 “Projects” all live in the same database that is shared with all clients as well as my firm. This is how I am able to get my “Global Views” on my Firm’s Main Menu.
Now you will be able to do this too.
So I am grabbing these pages (everything in Notion is really just a page defined to be used in some way - like a project) and moving them to the Databases page.
By moving them to the Page (before the Projects Database) I strip them of the Old Properties.
Next I can drag them into the new Projects database, and since these all came from my Nerd Internal section, I know in the new system I can assign them all to the Client: Nerd Enterprises.
Hover your mouse over where that checkbox should be, and it will appear (like magic). Click on it to ‘Select All’. Then click the ellipses and choose ‘Move To’.

Next, navigate to the Databases page and you are ready to drag them into the appropriate database in V2.0. In this case it would be the Projects Database.
Lesson Note:
The video for this lesson will walk you through how to do this next and final step, because it will be very difficult to explain the mechanics of this maneuver in Notion with screenshots. You will see what I mean.
The quick explanation is that you select all of these pages now on your databases page, and drag them into the database where you want them.
Then assign the client, and any other properties you like while you’re here.
UP NEXT: LESSON 4
How to Manage and Assign Bookmarks
See ya in the next lesson ;-)
© Copyright 2024 Nerd Enterprises, Inc. All rights reserved. Reproduction or duplication of this content without our express written consent is strictly prohibited.
