
Lesson 5 - How to Create and Manage Tasks

Bulletproof Notion Work Management System
For Accountants and Bookkeepers
Navigate to a client (or go create one first if you need to).
From Tasks Quick Views, click the drop down next to the blue ‘New’ button that appears at the top right when you hover your mouse over it.

Let’s start with the New Task Template.
Now STOP!
Are you thinking what I am thinking?...
“...collaborate and listen…”
OK seriously now.
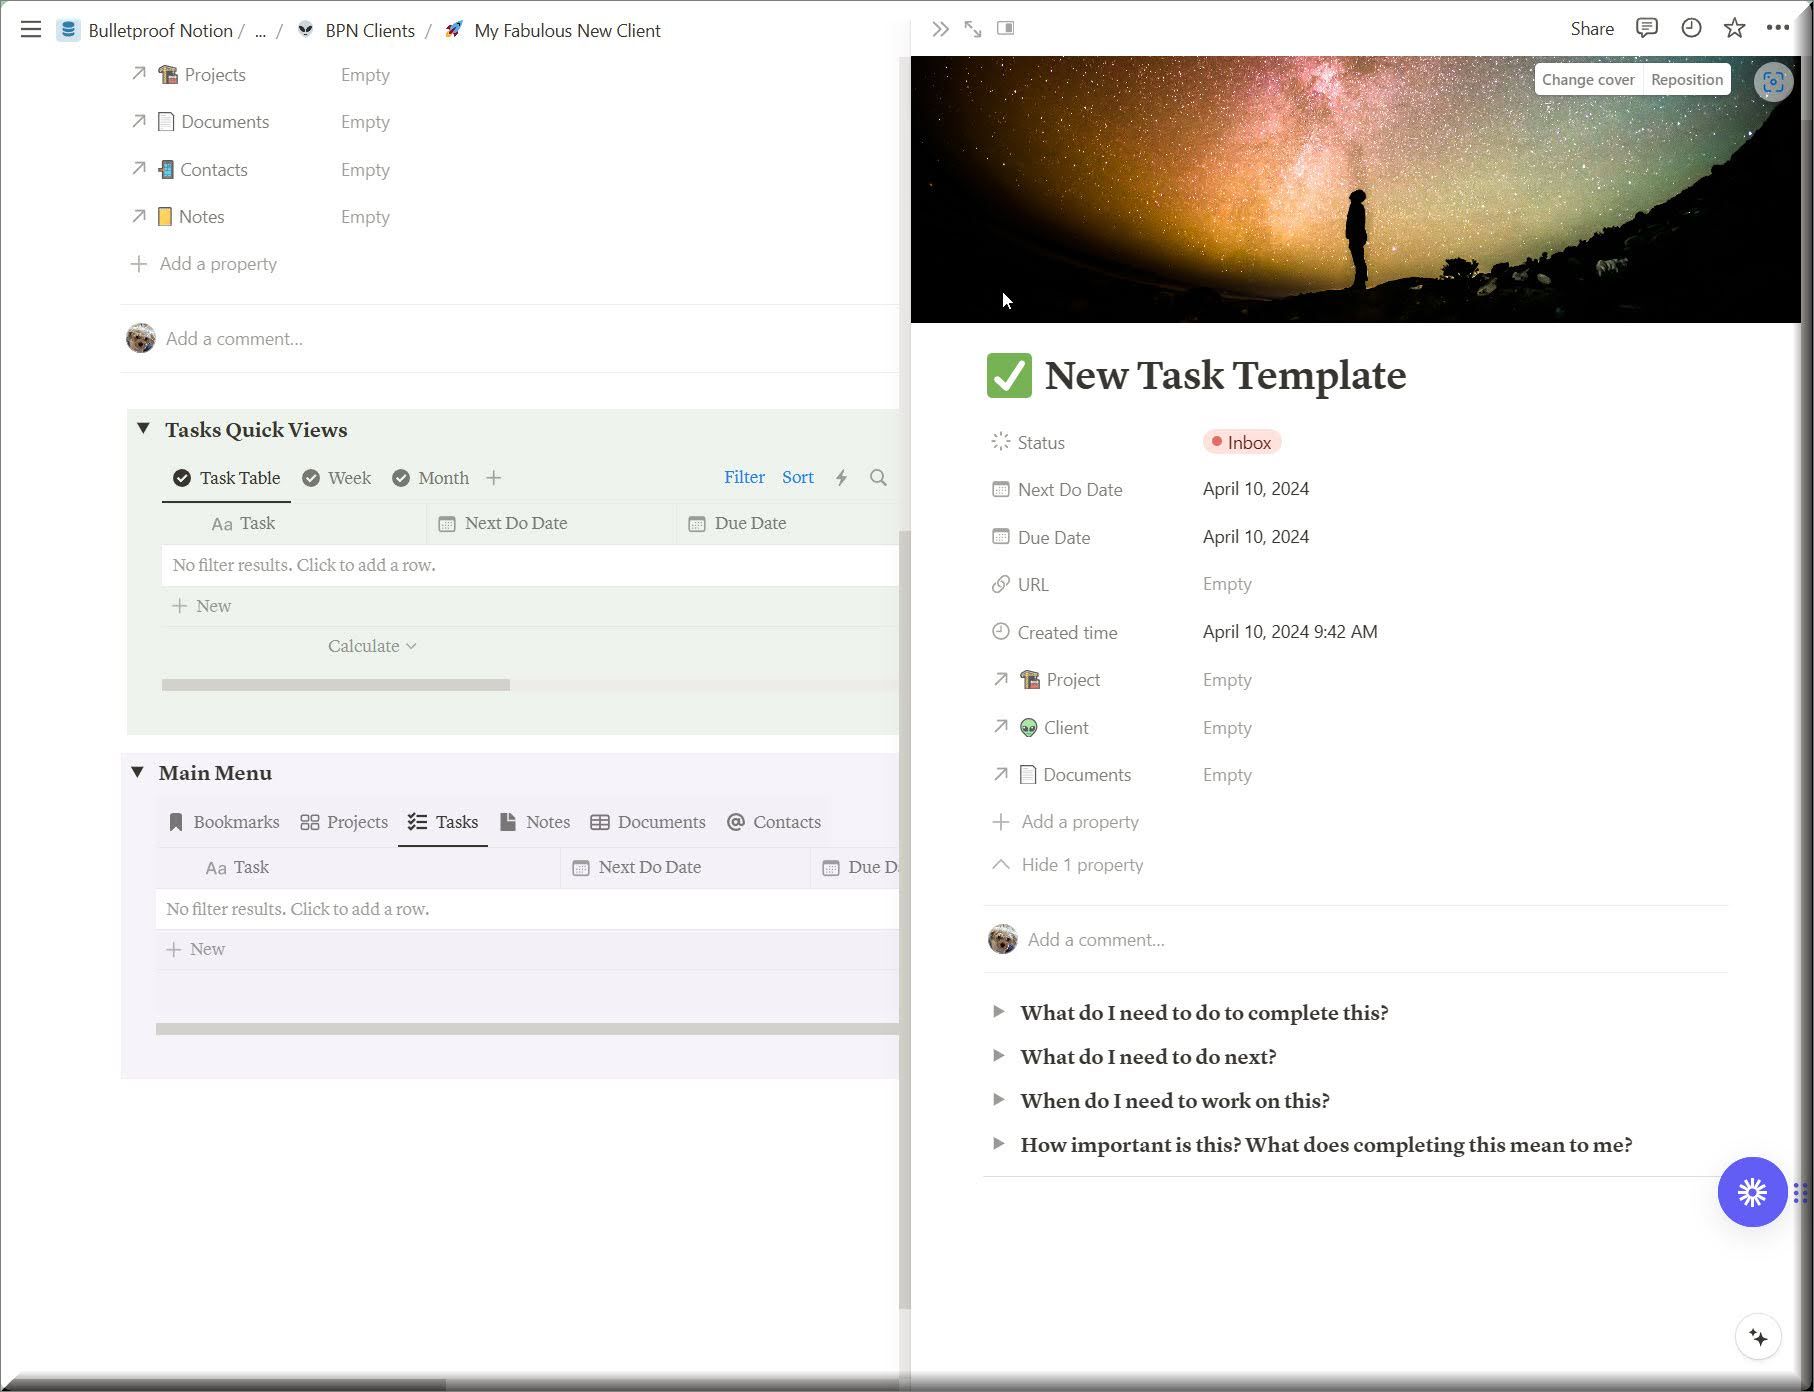
Many of you are going to be tempted to ignore those 4 questions at the top, especially if the task is super simple. BUT…
This is the reason why you are more stressed out instead of less with your current (non) system.

The reality is that if the task is super simple then this will only take a second to fill out.
This is about forming the “habit” of ALWAYS answering these questions.
This is how you “Clarify” a task.
You’re capturing it by creating the task.
These questions are right out of David Allen’s ‘Getting Things Done’. If you take the time to answer these questions on every task you create, then you will have extreme clarity because you will always know what needs to be done next.
I do not recommend changing these questions. I did not write them, so this is not about my ego. It is about what has been time tested and proven to work.


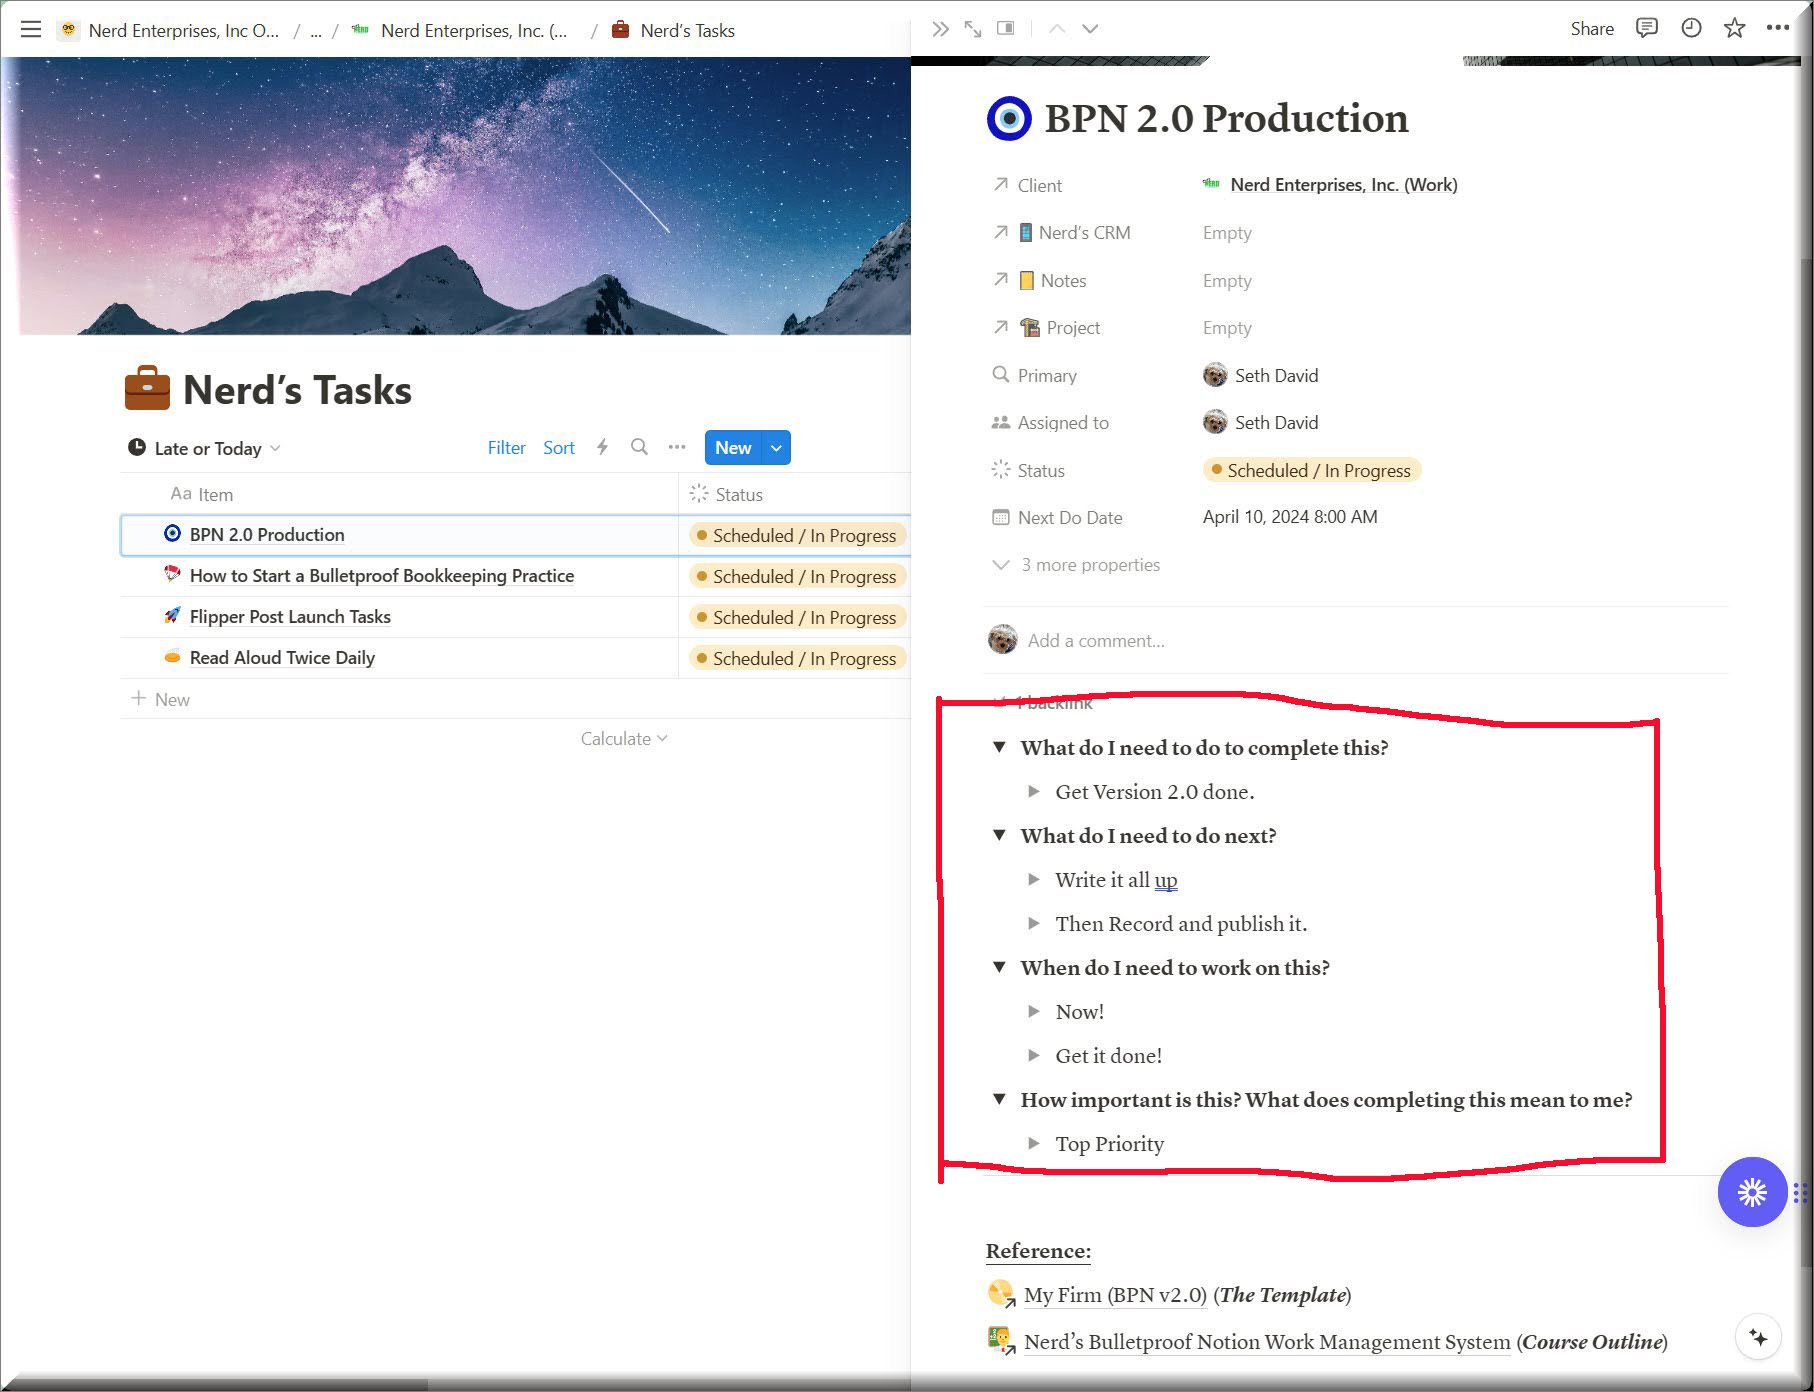
Later when we get into how to manage Projects you will see that the most important thing a project manager needs to know at all times is the next thing that needs to be done. And even with the most sophisticated software available, most people fail to clarify this and keep it clarified.
Try it. Your stress is fully refundable if it doesn’t work out.
Beyond that, you have all the space below to add any notes, links, and information you need at your fingertips in order to complete that task. Here’s an example of the task I have right now regarding this very thing I am doing right now. As you will see it doesn’t need to be a novel. Just enough to “clarify.”
Notice the clarification that this is a “top priority.”
I COULD provide a lot more context to this, and if I was collaborating with someone else I definitely would, but since this is just for me, I don’t need any more than this.
This is all you need to capture and clarify almost any task you need to complete.
And assuming you created this from within your client’s page, then you’ve organized it (put it in its proper place).
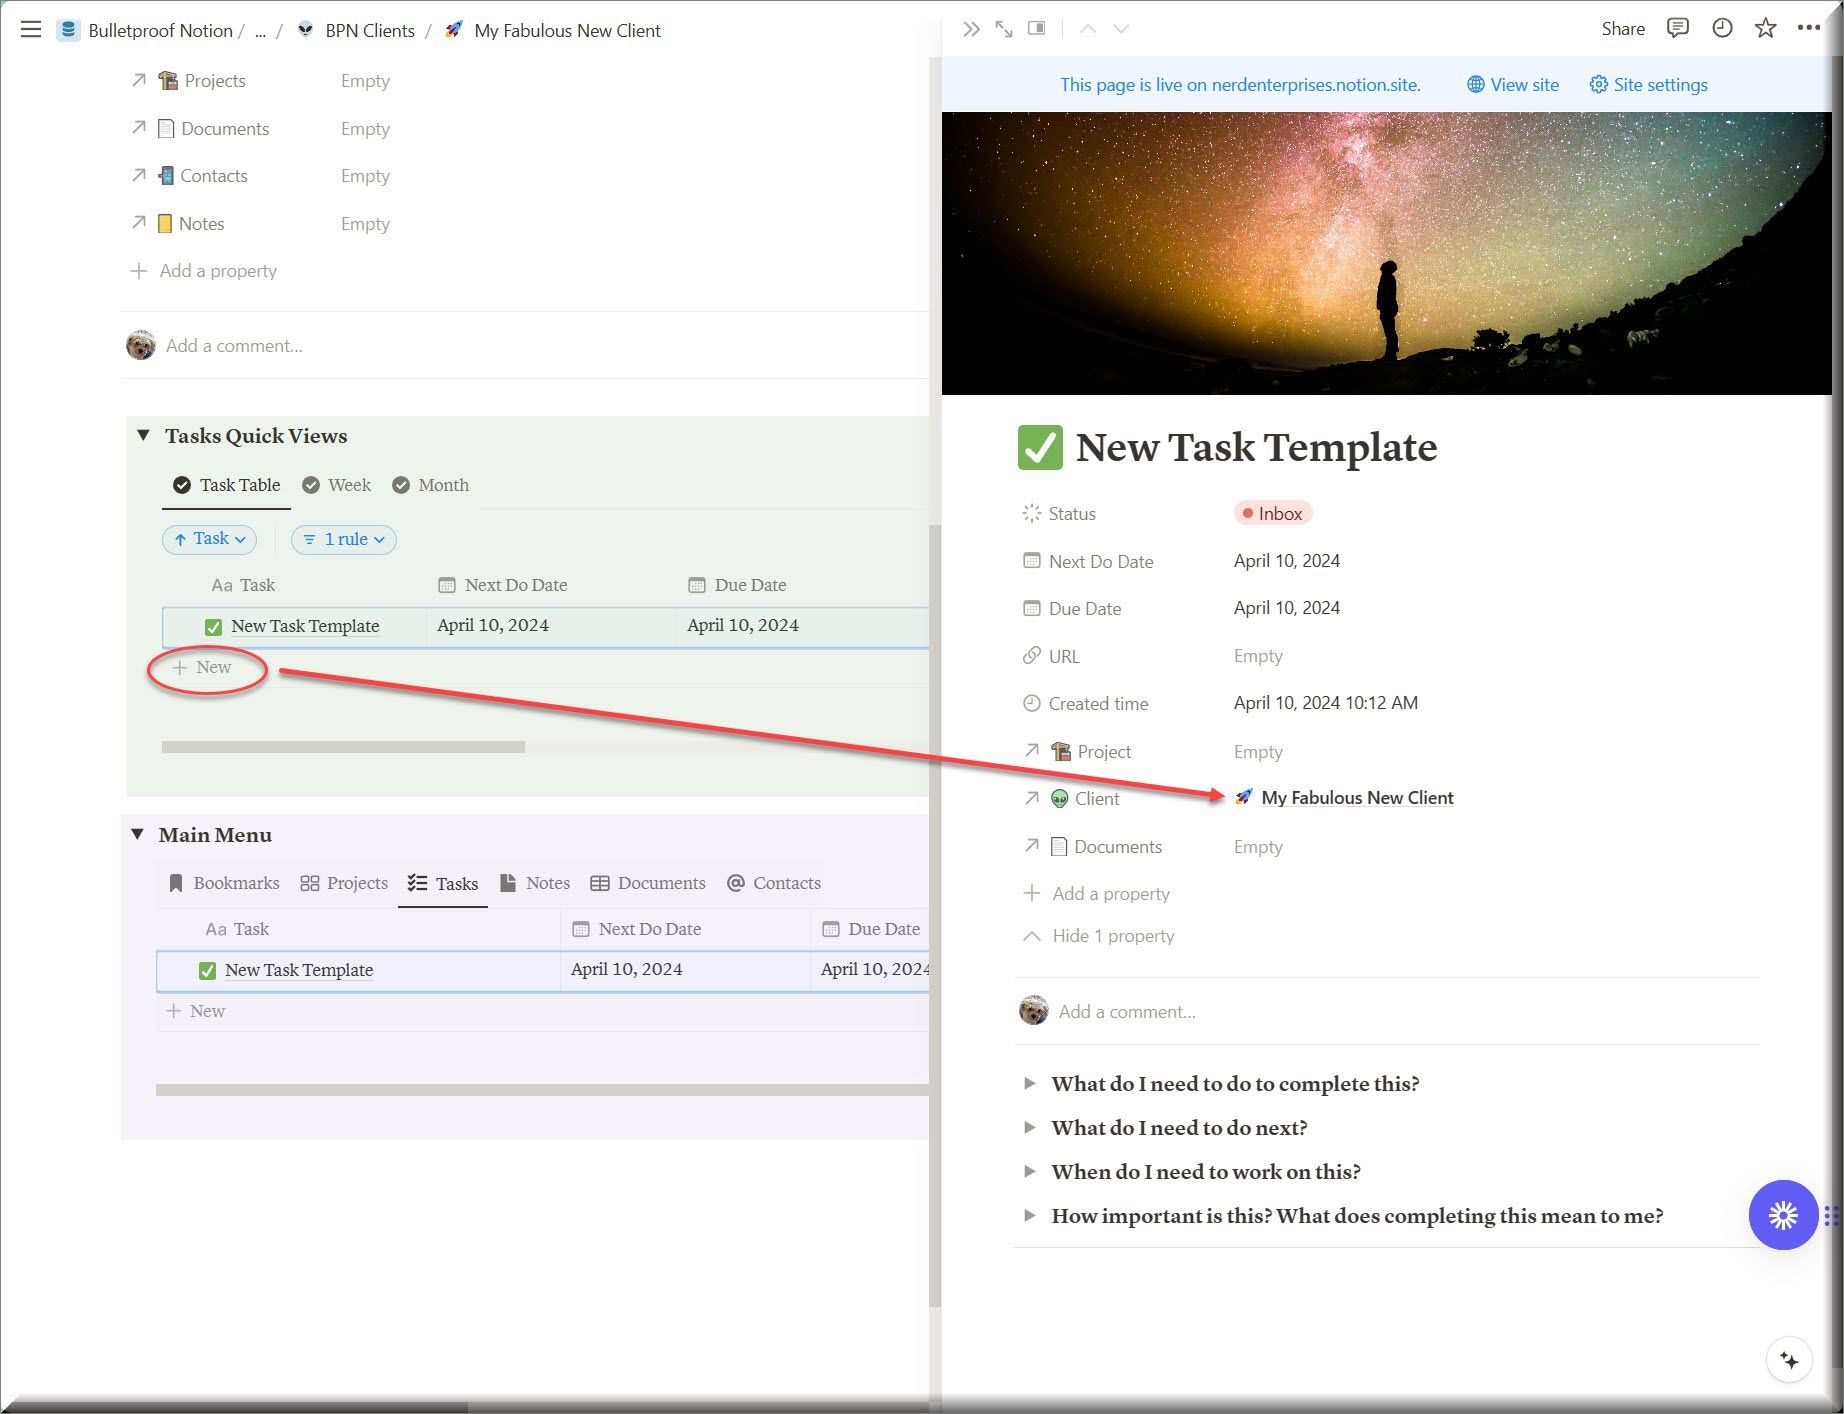
One important thing to note is that depending on exactly where you click to create the new task, the client may or may not get assigned automatically.
Notice below in the new task I created using the Blue New drop down template the client is not filled in.

If you use the ‘New’ option under the task table itself, the client will be filled in.
If you do it the first way, just make sure you assign the client, otherwise the task will be lost in the abyss!!
If this happens to you, do not worry. You can always find them in your Global Firm Views, and then assign them to the client.
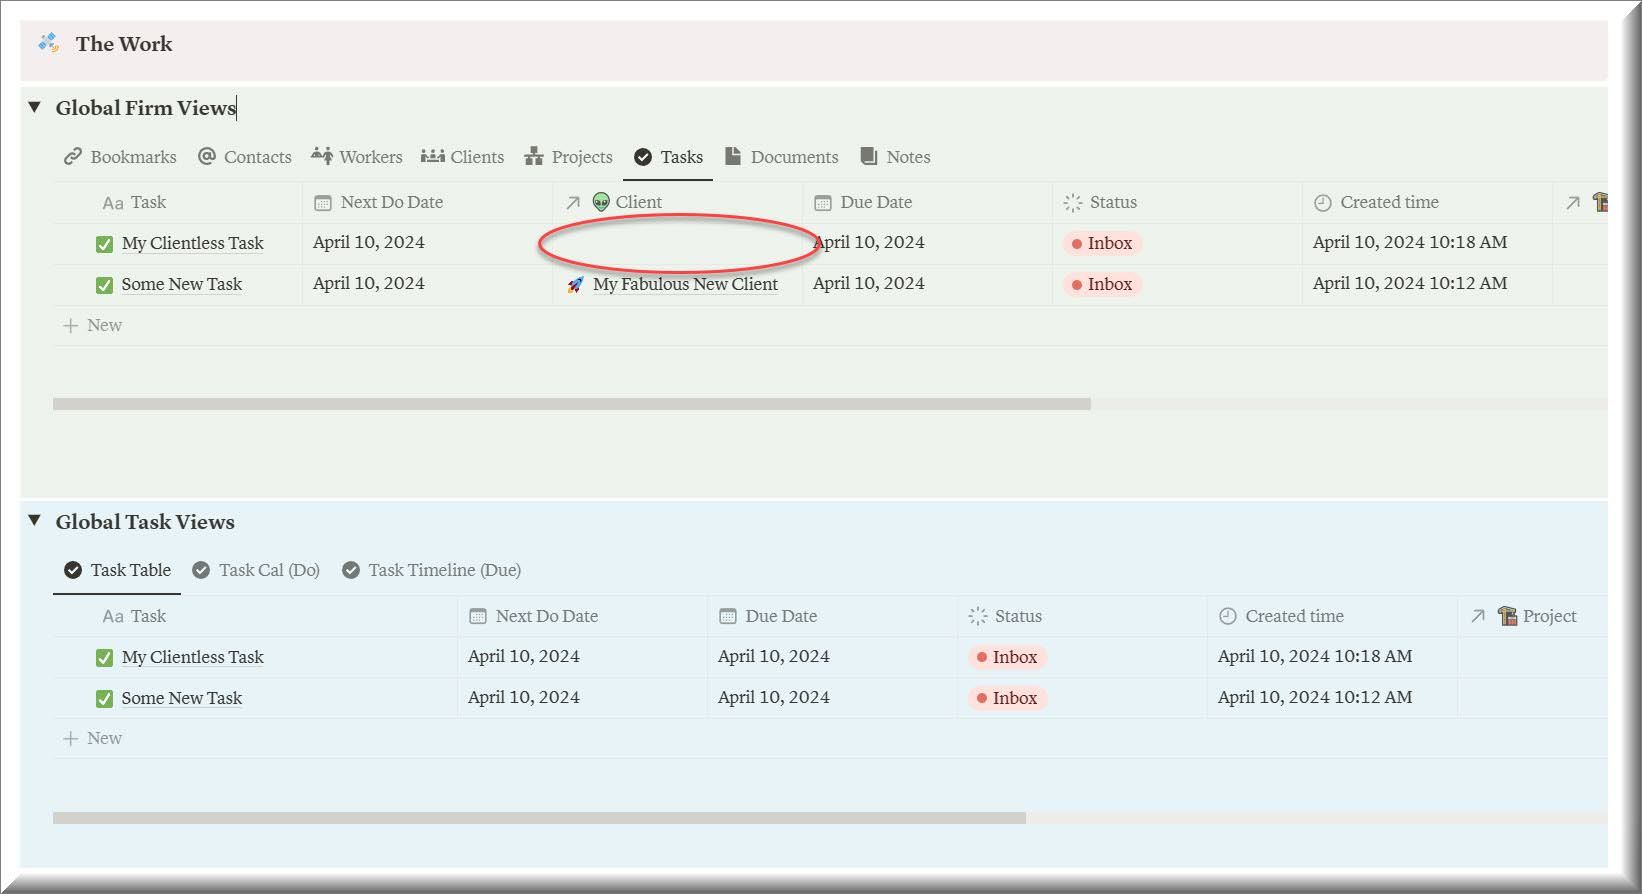
I did move the Client column over, so yours might not look exactly as above. You can scroll right, and click and drag it over.
You may also notice that the same tasks are shown below in “Global Task Views.” This is because above we are looking at the Tasks in the Global Firm Views and they are the same tasks as below. The difference is that in the bottom section ALL of your views are based on tasks. This is so that you can build out many task related views (e.g. grouped by client, assigned to, whatever you need).

I will show you how to create these views later on in the course.
Let’s take a quick look at the other task templates.
Request for Information
The idea of this is that you can share this page with your client, invite them as a guest, and give them edit access.
Then you can lay this out however you like. I set up the template with the toggle that gives you a couple of examples with Toggles or ‘To Do’ checkboxes.
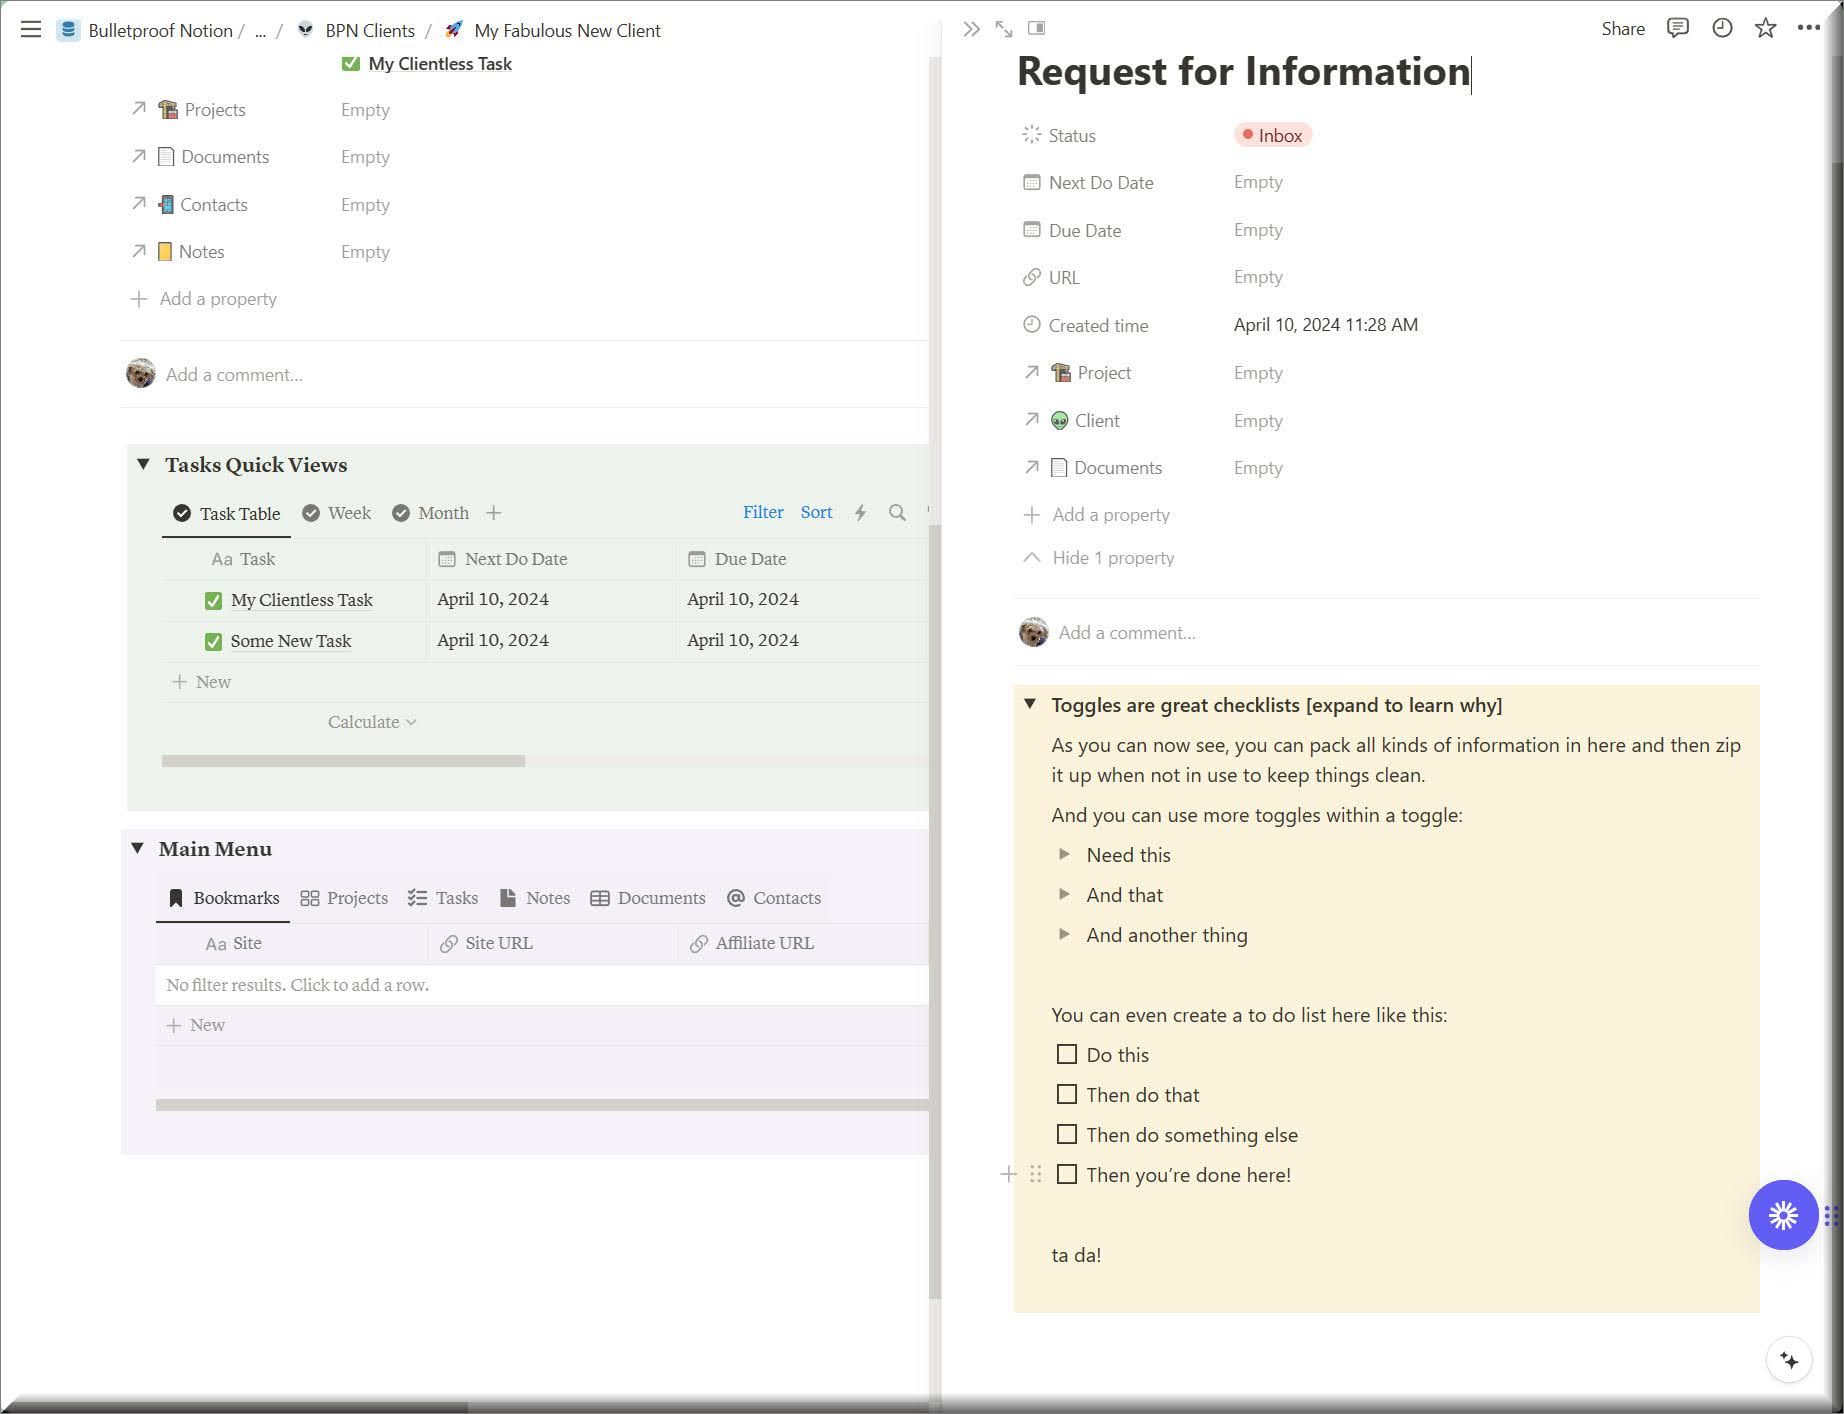
To create a toggle, just type ‘/toggle’ or to create a To Do type ‘/todo’ and the rest will be straight forward.
What I like about Toggles is that they can be expanded to reveal more details. You can include screenshots for example and this way when you collapse the toggle it is like neatly tucking it away. This keeps the page clean and the entirety of what is on it more visible.
Just make sure your client understands how these work! Once you are ready to fill out your request, you can delete the toggle I created as an example.
In version 1.0 I had a more complex table built into this template. This keeps it simple. When I teach you how to create databases etc… later in the course you can decide if you want to add something like that to this template. Or you will learn how to create a “Linked” Database, which you can do with a series of “Tasks” or “Notes” and link them here. Again just make sure your client understands how to navigate this - the simpler the better, usually!

Uncategorized Expenses
Only use this one if you are not using an app like Keeper (which I definitely recommend). When you copy this template, it will populate a table along with an “Instructions” page.
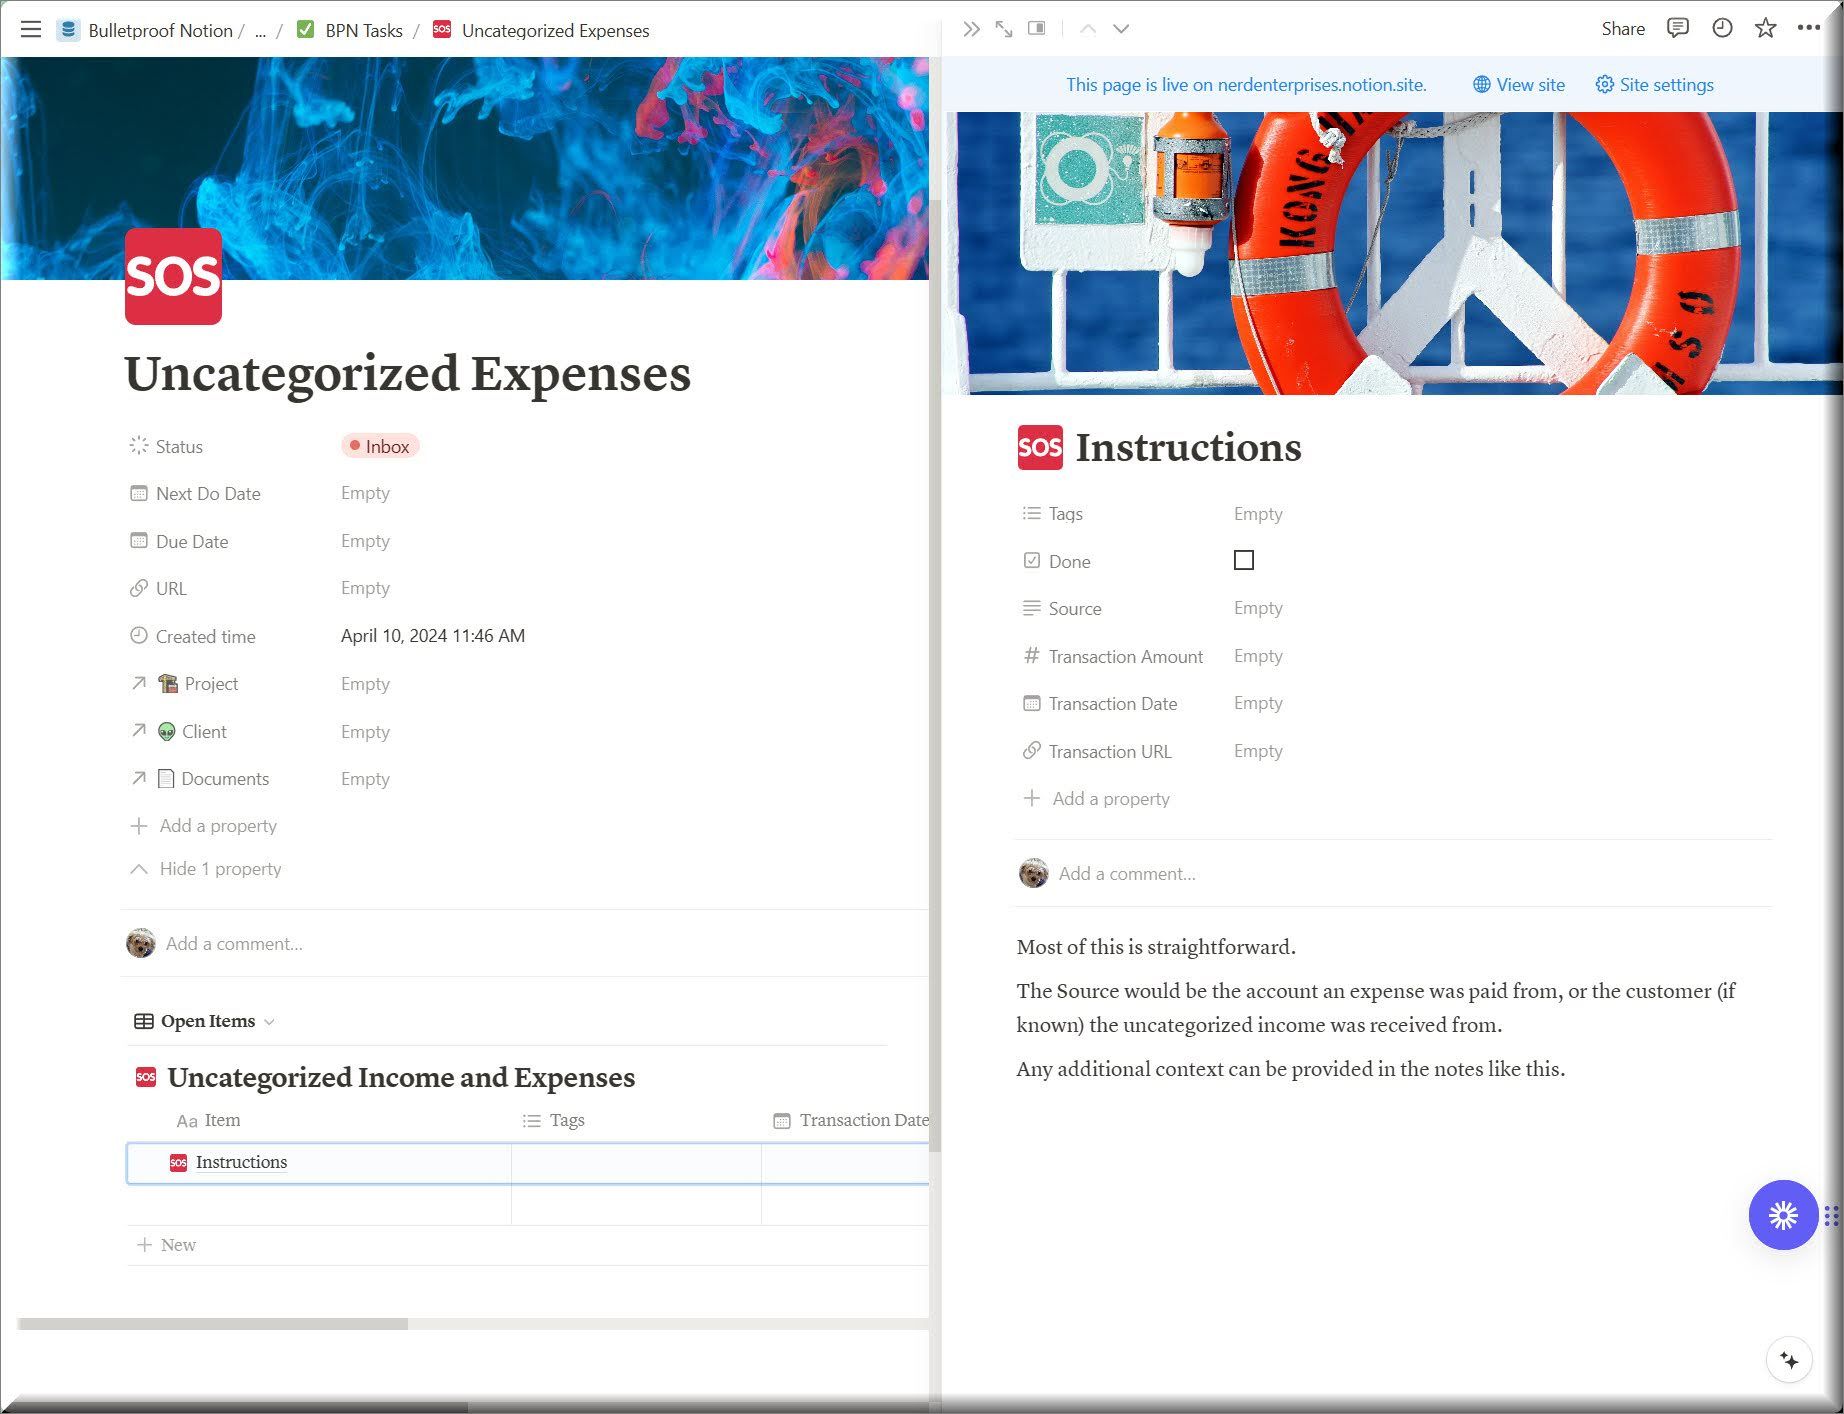
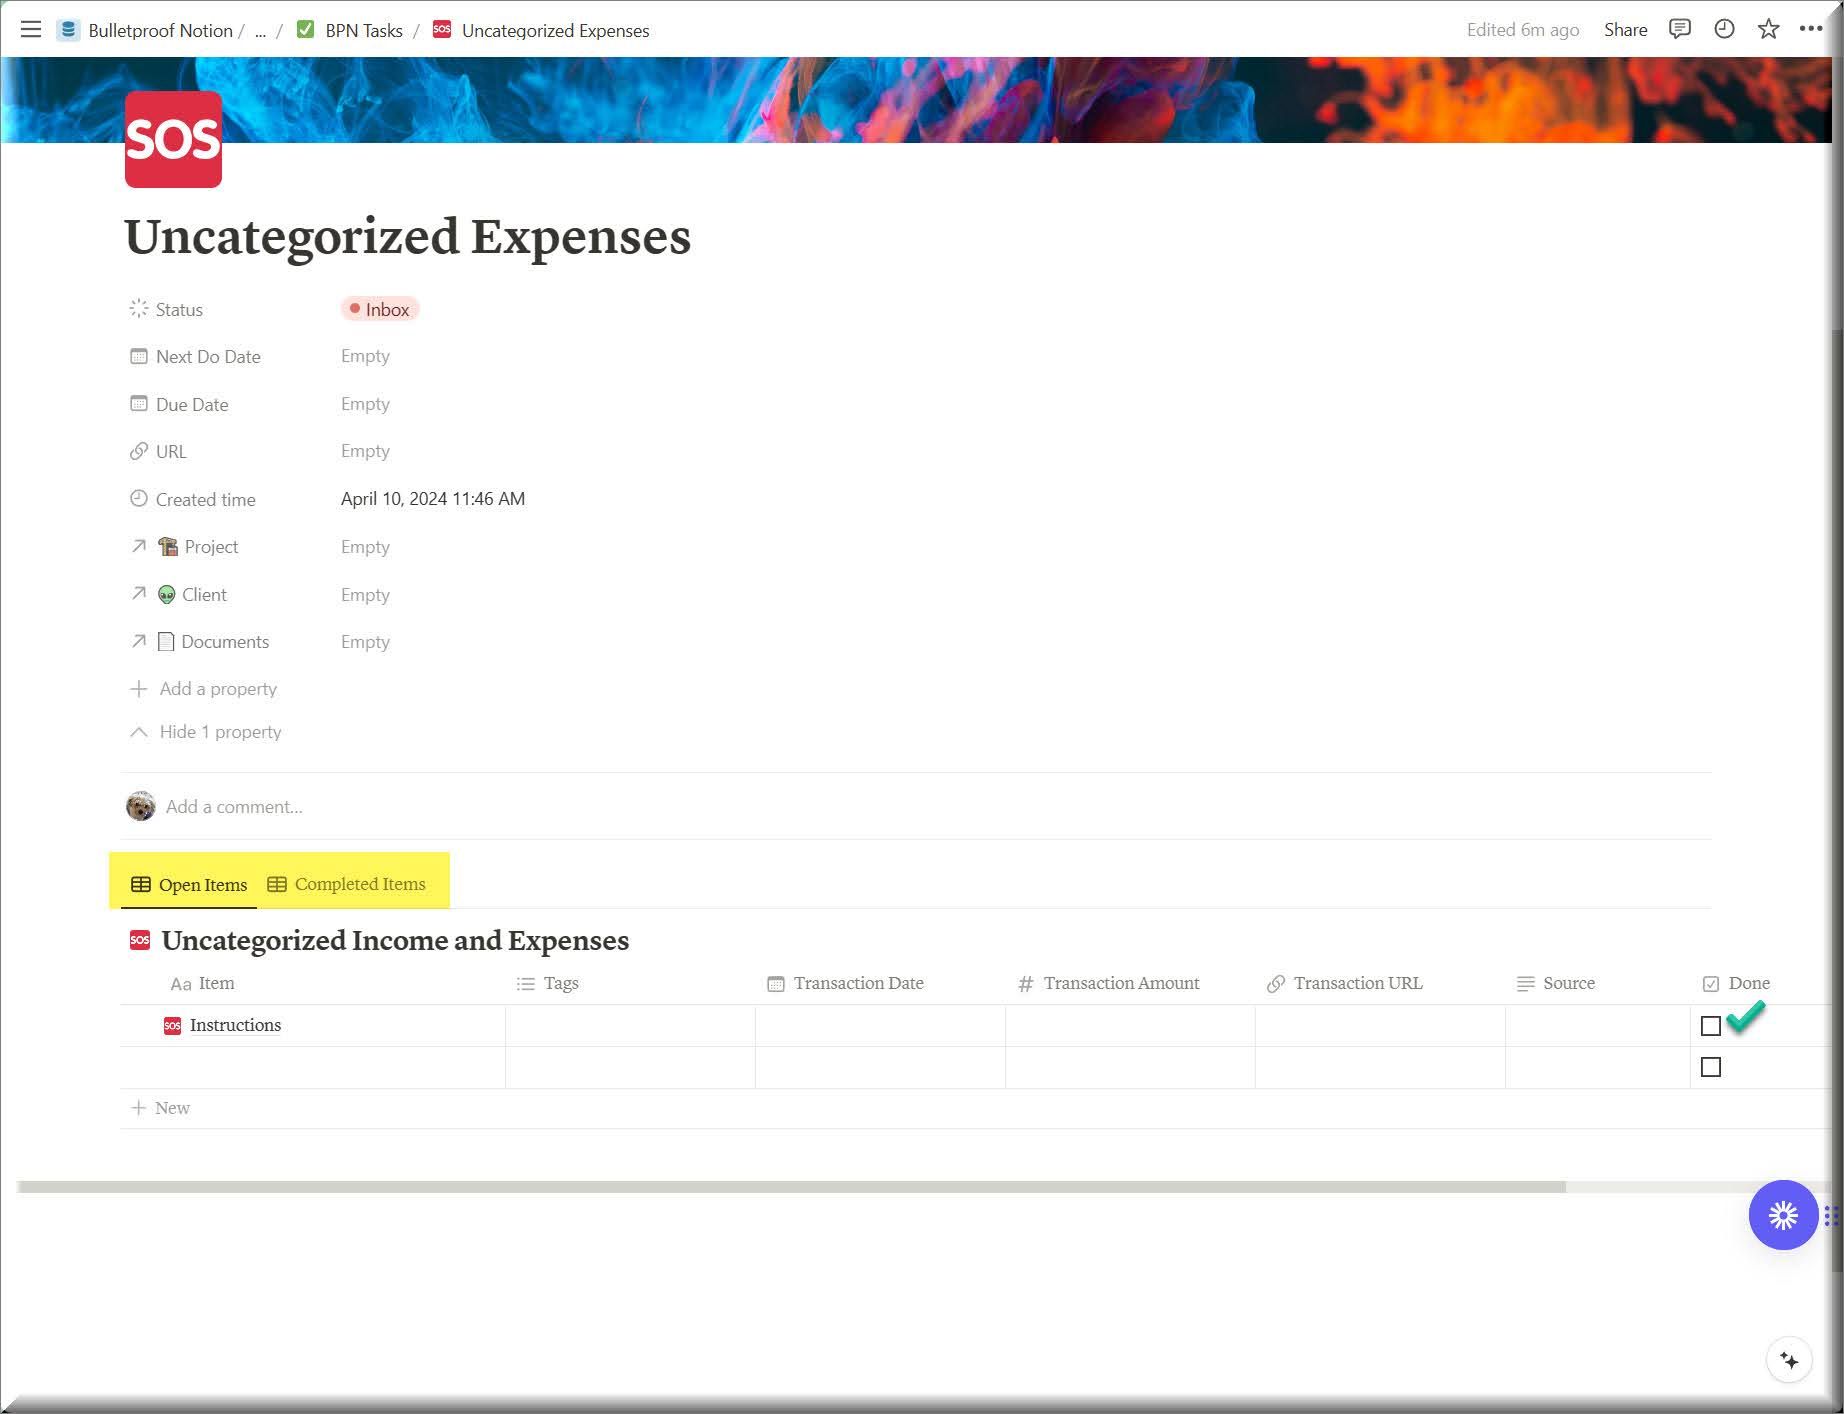
You only need to use this template once for any one client. Once you mark something done, it will disappear from Open Items and you will find it under Completed Items.
Essentially you will want them to open each transaction that you log here and write comments explaining what it was for. If you link to the transaction in the Transaction URL property (column) they can get directly to the transaction. Some clients might even go ahead and fix it for you!
The Source is where you can indicate the payment account that was used for expenses.
Every time I have ever asked a client about an uncategorized expense that is their first response: Which account was that paid with?
Use Tags however you see fit. There are none in there by default. Create what you like on the fly, or don’t use it at all.
Done means the transaction has been explained and then logged into QBO.
So at any given time the ‘Open Items’ view is what you are still waiting for from your client.
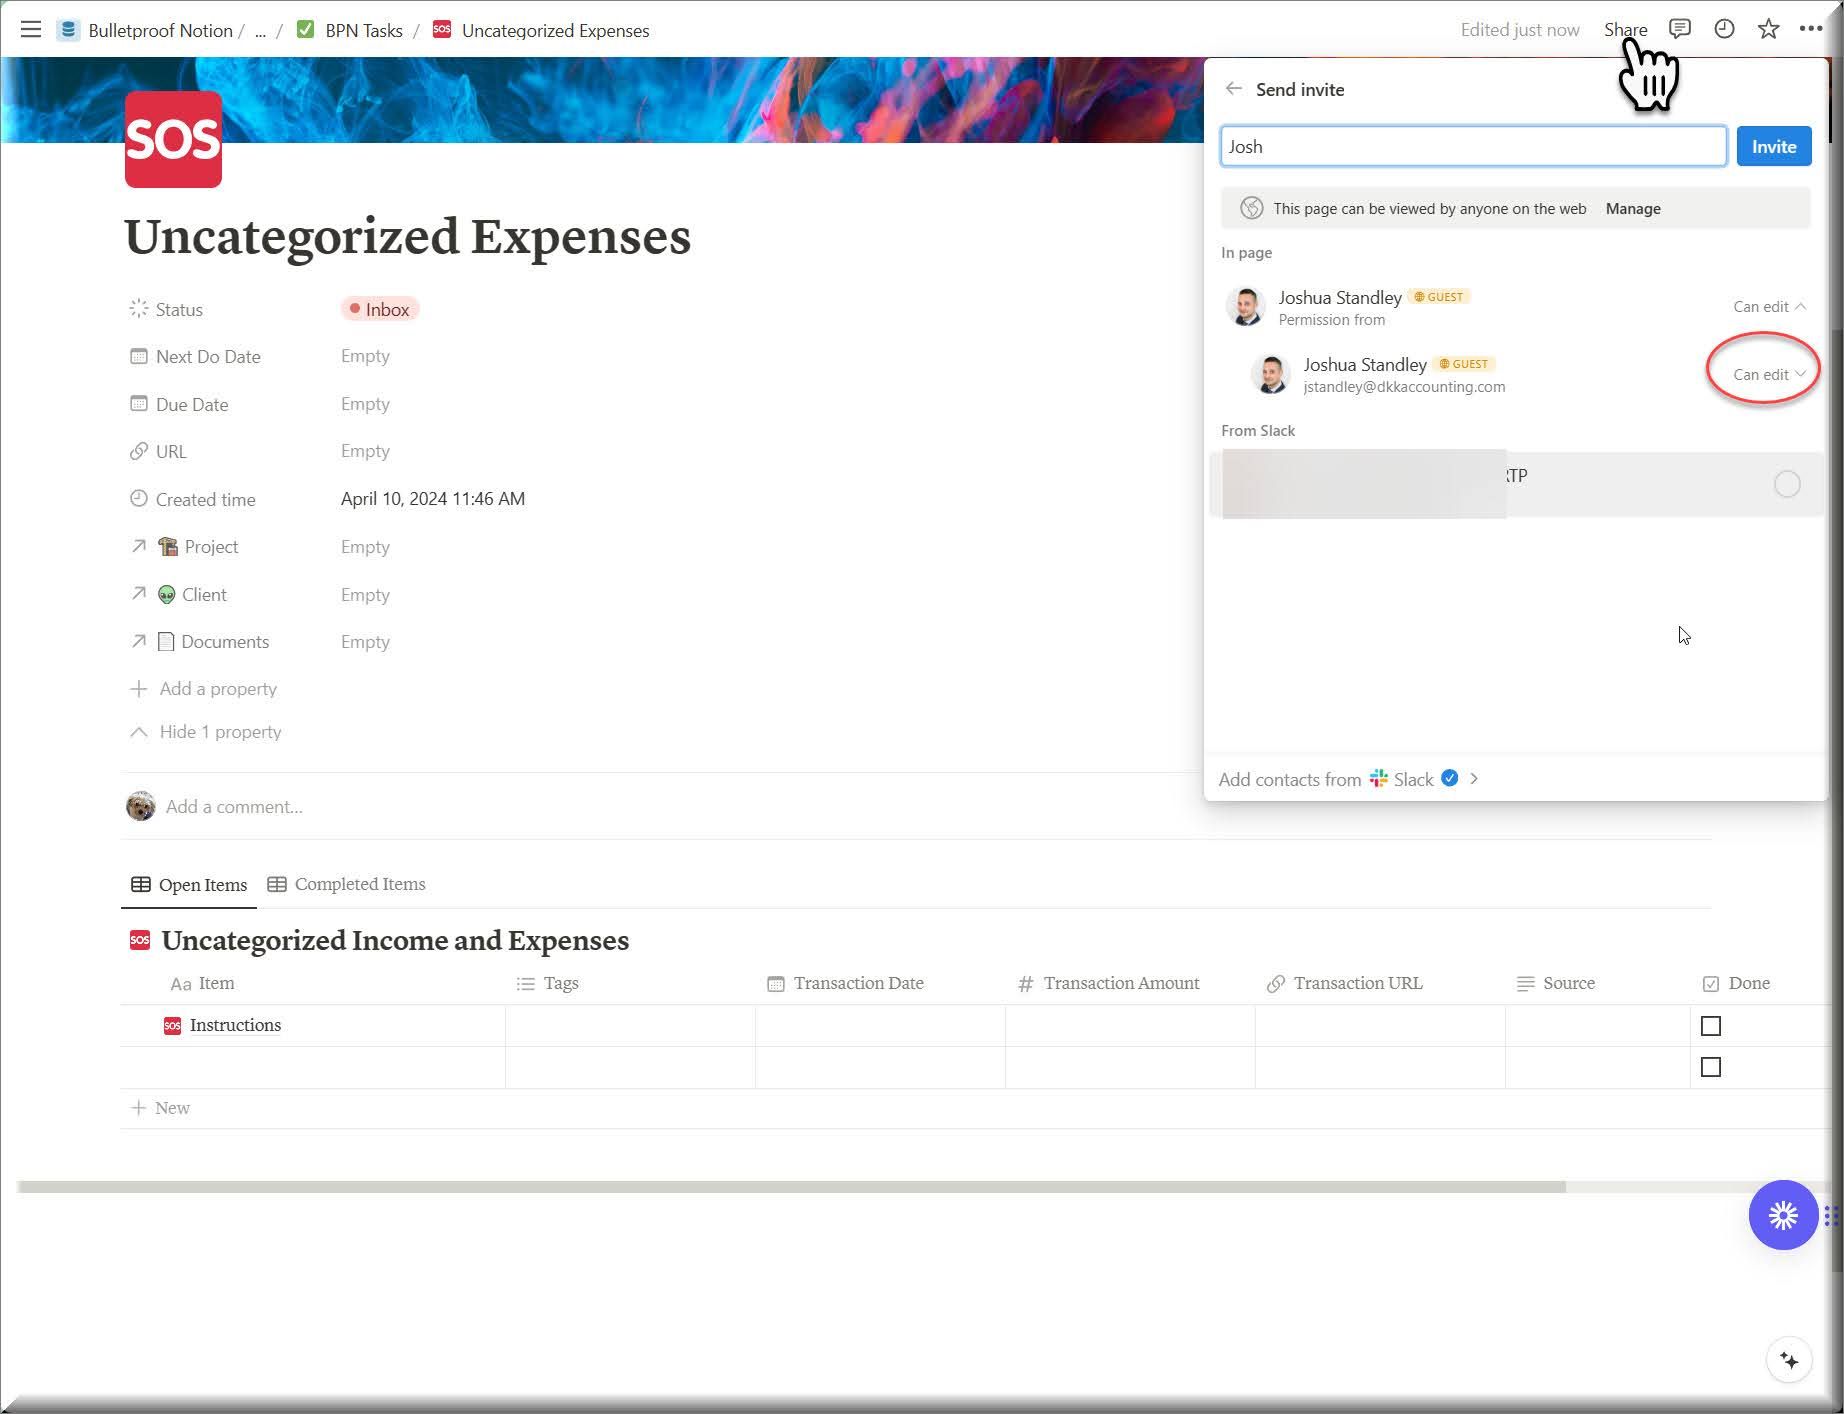
How to share a page with a guest
You can share this entire page with your client. You may want to get on a quick Zoom with them to make sure it’s 1000% clear how to use this.

Depending on your Plan with Notion you can invite up to a certain amount of guests, who can be given full edit access.
Here’s how you invite them: All you need is their email address, if they are not already in your system.
You might notice the “From Slack” part. That is because I have Slack connected to my Notion account which allows me to collaborate with people through Slack. Once you confirm and click Invite, they will get a notification letting them know.
UP NEXT: LESSON 6
How to Manage and Assign Notes
See ya in the next lesson ;-)
© Copyright 2024 Nerd Enterprises, Inc. All rights reserved. Reproduction or duplication of this content without our express written consent is strictly prohibited.
